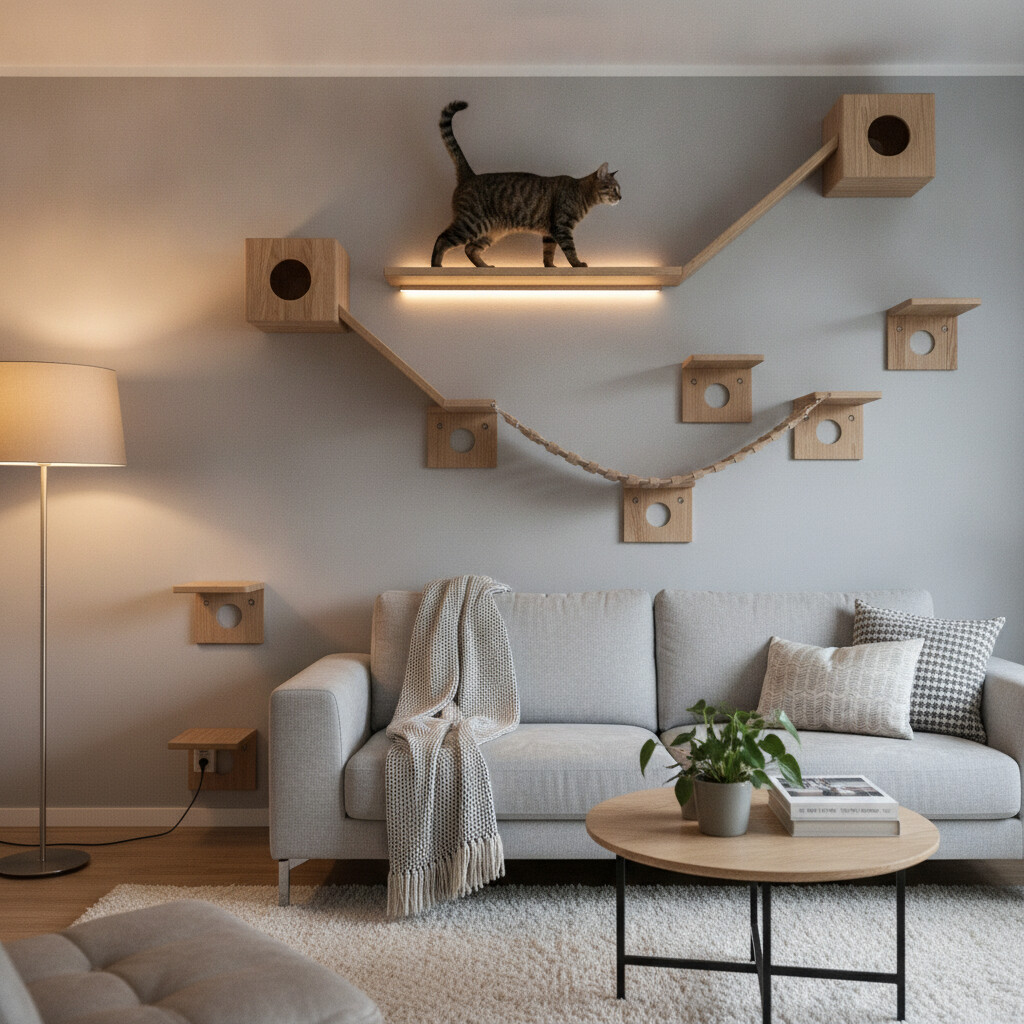
A cat highway is exactly what it sounds like — a series of wall-mounted shelves, ramps, and platforms that lets your cat move through vertical space. It’s a genuinely useful project: most indoor cats don’t get nearly enough height, and vertical space reduces territorial conflict, gives anxious cats an escape route, and provides a kind of activity that floor-level play simply can’t replicate.
A basic three-shelf cat highway can be built in an afternoon for under $80. Here’s how.
Why Vertical Space Is More Than Just Decoration
Cats are natural climbers. In the wild, height serves two functions: safety from predators and hunting vantage. Indoor cats retain both instincts. Research in multi-cat households consistently shows that increasing vertical resources reduces conflict — cats who can get above each other’s eyeline have a lower-stakes way to establish hierarchy without aggression.
For solitary cats, height provides security and environmental enrichment that floor-level perches can’t match. A cat who can survey their whole room from a high shelf experiences that space differently — as territory they can monitor, not territory that feels exposed. Our article on why cats need vertical space covers the behavioural science in more detail.
Planning Your Layout
Before you buy a single shelf bracket, spend 10 minutes watching where your cat already spends time. Most cats have preferred rooms and preferred heights. Start there — a shelf system in a room your cat avoids is one that won’t get used.
Questions to answer first:
- Flow: Where should the highway start and end? Ideally, incorporate existing furniture (a bookshelf, bed, windowsill) as a natural entry or exit point. This gives your cat a comfortable first step and reduces the “launch from the floor” problem.
- Ceiling clearance: Leave at least 18 inches between the highest shelf and the ceiling. Cats need room to stand, turn, and look down comfortably from the top position.
- Wall type: Drywall over studs is the most common case — straightforward to anchor. Plaster, brick, or concrete requires masonry anchors or specialised fixings. Renting? Heavy-duty adhesive mounting strips (Command large strips, rated for 7–10 lbs each) can work for lighter shelves on smooth walls, but check the rating against your shelf weight and cat weight combined.
- Multi-cat households: Build in multiple routes. Dead-ends create ambush points, which generate stress. A highway with a loop or at least two access points prevents one cat from trapping another.
Materials and Tools
For a basic 3-shelf cat highway run:
Materials:
- Floating shelf brackets (rated for at least 30 lbs each — look for load-bearing brackets, not decorative ones)
- Timber: 3/4" plywood or 1×8 pine, cut to length. 12–16 inches wide works well for most cats; 24–30 inches per shelf gives them room to sit and turn
- Carpet tile, sisal matting, or anti-slip adhesive grip tape for the shelf surfaces
- Construction adhesive or a heavy-duty staple gun to secure surface material to shelves
- Wall anchors rated for your wall type
- Lag screws (3 inches minimum into stud for secure mounting)
Tools:
- Stud finder
- Level (essential — a crooked shelf is one your cat won’t trust)
- Drill/driver
- Tape measure and pencil
Approximate cost: $55–$90 for materials, depending on shelf count and bracket type.
Step-by-Step Build
Step 1: Decide the spacing.
For most adult cats, a comfortable vertical step is 12–18 inches between shelf surfaces. For kittens, seniors, or cats with joint issues, reduce this to 8–10 inches and consider adding a ramp. Our guide on keeping an aging cat mobile and comfortable covers why this matters for older cats specifically.
Horizontal spacing (how far apart shelves are along the wall) depends on your cat’s jumping ability and confidence. A typical 2–3 foot horizontal gap is fine for most cats. Timid or older cats appreciate 18 inches or closer.
Step 2: Mark your stud locations.
Every bracket must be secured into a stud or a rated wall anchor. Don’t risk a shelf mounted only in drywall — a large cat jumping onto it creates substantial lateral and downward force. Use a stud finder, confirm each location with a small pilot nail, and mark the centres clearly.
Step 3: Mount the brackets.
Hold each bracket in position. Use your level to confirm it’s perfectly horizontal — even a slight tilt will be obvious once the shelf is on and a cat sits on it. Pre-drill pilot holes slightly smaller than your lag screws, then drive the screws flush. Over-tightening can strip drywall; firm is enough.
Step 4: Attach the shelves.
Most floating shelf kits have slots or pins that lock the timber onto the bracket. If you’re using plain timber boards, attach from below using wood screws up through the bracket’s shelf holes. Make sure the shelf cannot slide forward off the bracket — add a small bracket lip or screw stop if needed.
Step 5: Surface the shelves.
Bare wood is slippery, cold, and not pleasant for cat paws. Carpet tile (cut to size, adhered with construction glue or double-sided tape) is the most common solution and easy to replace when worn. Sisal matting is harder-wearing and gives cats a scratch surface. Avoid long-pile carpet — it traps hair, is hard to clean, and becomes unpleasant over time.
Step 6: Add ramps where needed.
A scrap of timber cut at 30–35 degrees, surfaced with sisal, makes a solid ramp. Screw through the lower end into the shelf below, and attach the upper end to the shelf above or directly to a bracket. Test it under your own hand pressure before letting the cat use it.
What to Add Once It’s Built
The shelves are infrastructure. The enrichment comes from what you layer on top:
A padded top perch. A small fleece cushion or wool pad at the highest point becomes the most coveted spot in the house. In a multi-cat household, the cat who claims the top shelf is the one who feels most secure — this alone can reduce ground-level tension.
A scratching element. Wrap a section of sisal rope tightly around one of the ramp posts or a bracket leg. Cats who scratch at height feel more settled; it’s a territorial behaviour as much as a physical one.
An enclosed hiding spot. A small wooden box or fabric tunnel fixed to one of the mid-height shelves becomes an elevated den. Cats feel safer when they can observe without being observed. See our article on 7 cheap DIY cat enrichment ideas for simple hide-box options.
A window view. If any shelf position is near or leading to a window, prioritise that one. A high perch with a bird-watching angle is hours of passive entertainment that costs you nothing once it’s installed.
Safety Checks Before Use
Before your cat uses the highway for the first time:
- Apply force to each shelf by pressing down hard with your hand — nothing should creak, flex, or shift
- Check for any protruding screws or sharp edges on the undersides of shelves
- Confirm all surface materials are fully adhered (no curled edges that could catch a claw)
- In multi-cat households, check that there are no dead-end positions with no exit
- Ensure there’s something soft to land on below the lowest shelf, or that the lowest shelf is at a reasonable height for a missed jump
The Bottom Line
A wall-mounted cat highway turns unused vertical space into the most interesting real estate in your home — from your cat’s perspective. Three shelves, a ramp, and an afternoon is all it takes to give an indoor cat environmental complexity they’ll use every single day.
Start simple. Add a shelf every few months. Once your cat is regularly using the top position and you catch them using it as a lookout, you’ll know it’s working.