Most store-bought window perches get used twice, then ignored. The problem isn’t your cat — it’s the design. Cats are picky about stability, height, and comfort, and most commercial options fail on at least one. A DIY window perch you build yourself is almost always sturdier, better-sized, and cheaper.
Why Most Window Perches Fail
Cheap window perches fail for predictable reasons:
They wobble. Cats test surfaces before committing to them. A perch that shifts when they step on it gets rejected immediately. Suction-cup mounts, in particular, tend to give way over time — and once a cat has had a perch fail on them, they don’t forget.
They’re too small. A 12-inch shelf is not enough for most cats to comfortably stretch out, which is what they actually want to do. A usable perch is at least 14–16 inches wide and 10–12 inches deep — enough for a full-grown cat to lie down without hanging off the edge.
They’re at the wrong height. Cats prefer to observe from elevated positions. A perch at window-sill height (often 24–36 inches from the floor) is usually fine, but if there’s an existing piece of furniture nearby at the same height, your cat will choose the furniture instead every time.
Build the perch right, and your cat will use it. Here’s how.
What You’ll Need
Materials:
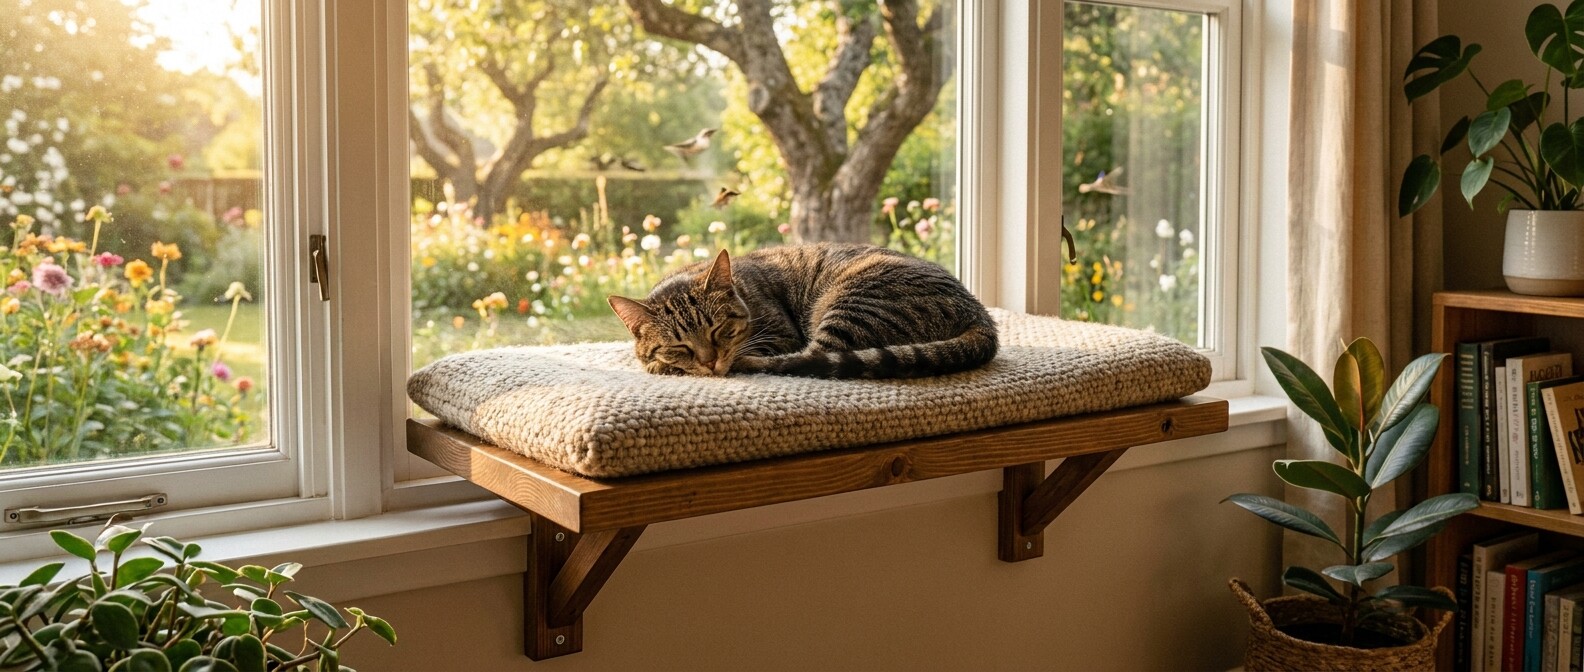
- One piece of 1x12 pine or plywood, cut to 14–16 inches long (your perch platform)
- Two L-brackets (heavy-duty, 8–10 inch span) — these mount to the wall studs
- Screws appropriate for your wall type (drywall anchors if you can’t hit a stud)
- Sandpaper (120 grit to smooth edges)
- A non-toxic pet-safe finish or paint (optional — raw pine works fine)
- A non-slip pad or outdoor carpet remnant cut to size
Tools: drill, stud finder, level, tape measure, screwdriver.
Optional extras: foam pad or folded fleece blanket for comfort; short wooden lip along the front edge to prevent items sliding off.
Step-by-Step: Building the Perch
1. Find the right location. Cats prefer windows with a view — bird activity, street life, or garden movement. South or west-facing windows give afternoon sun, which cats love. Check the wall below the window for studs using a stud finder; bracket mounts are far stronger into studs than drywall anchors.
2. Cut and sand the platform. If you’re buying timber from a hardware store, ask them to cut it to length — most will do this free. Sand all edges smooth, including the underside. Any rough edge your cat’s paw catches on will deter use.
3. Mount the L-brackets. Use your level to mark bracket positions at equal height on the wall. Mount them into studs where possible. When both brackets are installed, check the level again — an off-kilter perch won’t be used.
4. Secure the platform. Lay the plank across both brackets and screw upward through the bracket holes into the underside of the platform. Don’t rely on the platform just resting on the brackets — fasten it properly. Give it a firm downward push: it should not flex.
5. Add grip and comfort. Non-slip matting on top prevents the “I stepped and it moved” reaction. Cut a piece of outdoor carpet or yoga mat to size and adhere it with a staple gun or non-toxic adhesive. Add a folded fleece blanket on top if your cat prefers soft surfaces (most do).
6. Create access if needed. If the perch is more than 18 inches off the ground, give your cat a route up — a cat tree nearby, or a smaller intermediate platform. Cats will use ramps, steps, and furniture as natural access points.
Getting Your Cat to Actually Use It
Some cats discover the perch immediately. Others need encouragement.
Position it facing something interesting. A bird feeder outside the window, a busy footpath, or a garden with movement makes the perch a destination rather than just a shelf.
Make it smell right. Rub a small amount of catnip into the fabric, or place a worn clothing item on it for the first week. Familiar scent = safe territory.
Don’t force it. Place treats on the perch and leave your cat to discover it. Picking them up and putting them on it typically backfires — cats need to choose elevated spots for themselves.
Most cats claim a comfortable, stable, well-positioned perch within a few days.
Variations Worth Considering
Heated version: A low-wattage heated pet pad under the blanket layer makes the perch irresistible in winter. K&H and Snuggle Safe both make vet-recommended options.
Multi-level shelf system: Once you’ve built one perch successfully, adding a second shelf 12–16 inches higher creates a climbing route. Cats in multi-cat households particularly benefit from having more vertical options — it reduces competition for prime spots.
Wall-mounted cat walkway: The same L-bracket method scales up to a series of shelves along a wall. This is especially useful in small apartments where floor space is limited. For more ideas on indoor territory enrichment, see 7 Cheap DIY Cat Enrichment Ideas That Actually Work and Indoor Cat Enrichment: How to Keep an Indoor Cat Stimulated.
Total materials cost for a basic perch: $20–45, depending on what you already have on hand. That’s less than most of the store-bought options that end up being ignored.